In this tutorial, we will show you how to install new packages/services.
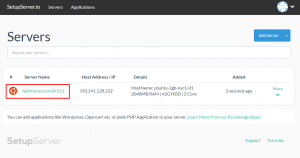
Login to your SetupServer.io Account and select the Server from the dashboard for which you want to install new services.
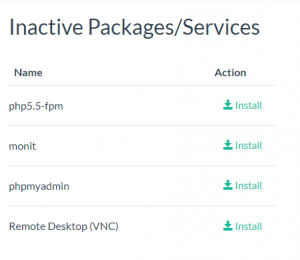
After that, click on “Services” tab from the right side vertical navigation bar and go to Inactive Packages/Services section and click on “Install” button corresponding to package/service you wanted to install.
After successful installation of new Service/Package, that package/service will be displayed under Active Packages/Services Section and all the necessary controls will be there on the same row beside the installed package/service name.
Monit Installation
After clicking “install”, the modal will be generated. Fill the Modal with desired information such as:
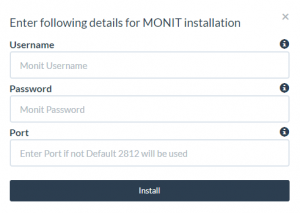
- Username – Enter the Username for Monit installation
- Password – enter password for Monit installation
- Port – Enter the port on which you want to install Monit if left blank the default 2812 port will be assigned for Monit service
After filling all the above details click “Install” button on Modal to install Monit on your server.
If you want to open Monit Settings, then go to Active Packages/Services section and click on “Open” button. You will be redirected to a new window and you will be asked to enter Monit Username and password that you entered while installation.
phpMyAdmin Installation
After clicking “install”, the modal will be generated. Fill the Modal with desired information such as:
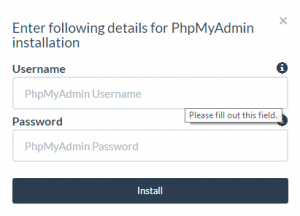
- Username – Enter the Username for accessing phpMyAdmin
- Password – enter password for accessing phpMyAdmin
After filling all the above details click “Install” button on Modal to install phpMyAdmin on your server.
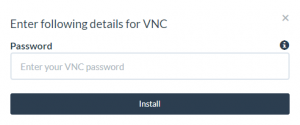
VNC Installation
Virtual Network Computing or VNC is a graphical desktop sharing system that uses the Remote Frame Buffer protocol (RFB) to remotely control another computer. It transmits the keyboard and mouse events from one computer to another, relaying the graphical screen updates back in the other direction, over a network.
You just need to provide a password for VNC installation. After that just click on “Install” button on Modal.